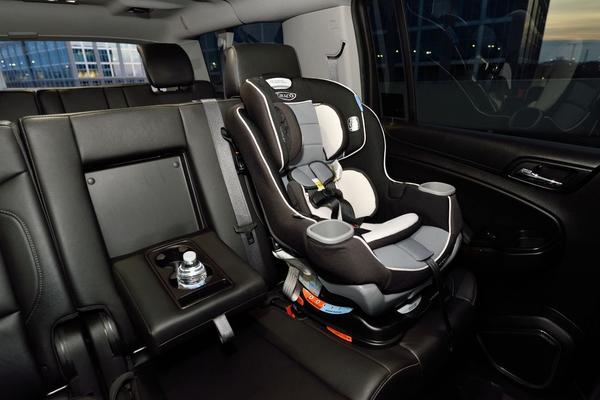
The car seat is buckled in, the straps look tidy, and nothing rattles when you close the door. That can feel like a job finished. Yet some of the most common car seat installation mistakes are almost invisible: a belt that is not locked, an incorrect belt path, or a recline indicator just outside its approved range.
If you have already installed your child’s seat, this is a practical second-look guide. The goal is not to pull everything apart unnecessarily. It is to check the points that actually determine whether the seat is secured and whether your child is restrained correctly.
Start With the Two Manuals, Not a Generic Video
Your car seat manual explains its approved installation methods, while your vehicle owner’s manual identifies suitable seating positions, belt-locking procedures, and anchor locations. Both matter. Check the seat’s labels for its permitted weight and height ranges, too.
Common Mistakes That Make a Secure-Looking Seat Unsafe
Using the Wrong Belt Path
Convertible seats often have separate paths for rear-facing and forward-facing installations. Passing a seat belt or lower-anchor strap through the wrong one changes how the restraint manages crash forces. Trace the routing from one side to the other and compare it with the diagram for the exact mode you are using. Check that the webbing lies flat without twists.
Testing Movement at the Wrong Place
A rear-facing seat can move noticeably near its head end and still be correctly installed. Test where the seat belt or lower-anchor strap passes through the seat, not at the top of the shell. Grip that area and tug firmly side to side and front to back. More than one inch of movement at the belt path means the installation needs adjustment.
For example, an infant carrier might rock when you touch its canopy, but the base should remain secure at its belt path. If you install an infant car seat with a removable base, check that the carrier also clicks fully into the base according to its instructions.
Forgetting to Lock the Vehicle Seat Belt
A belt may feel tight when you finish pulling it, then loosen because it has not been secured in the required locking mode. Some vehicles use a switchable retractor; some seats provide a built-in lock-off. The correct method depends on both manuals. Do not assume that simply buckling and tightening the belt completes the job. Confirm that it stays tight after installation.
Using Lower Anchors and a Seat Belt Together
Two attachment systems might sound more secure than one, but they are not automatically intended to work together. Generally, install with either the vehicle seat belt or the lower anchors, unless both manufacturers expressly permit simultaneous use. The seat belt method is not inferior when used correctly.
Lower anchors also have weight limits. As a child grows, the child-plus-seat weight may require switching to a seat-belt installation. Read the seat’s label and vehicle guidance rather than relying on the limit of a different model.
Assuming the Center Seat Has Lower Anchors
Many vehicles have lower anchors at the two outer rear positions but not a dedicated pair in the center. Borrowing one anchor from each side is permitted only when both manuals allow it. If they do not, a correctly installed center seat using the seat belt may be an option. Otherwise, choose an appropriate outer rear position where you can achieve a secure installation.
Ignoring the Rear-Facing Recline Indicator
Rear-facing seats must sit within the angle approved by their manufacturer. A seat that is too upright can let a young baby’s head fall forward, while an excessively reclined seat may perform differently from its tested configuration. Park on level ground and read the indicator exactly as instructed. Some seats specify different recline ranges as children grow.
For a focused refresher before your next trip, a guide to infant car seat recline angles makes a useful companion to this check.
Leaving the Forward-Facing Top Tether Unattached
The top tether is not interchangeable with the lower anchors. For a forward-facing harnessed seat, it helps limit forward movement of the seat and child’s head in a crash. Attach it to the designated vehicle tether anchor, not a cargo hook or other nearby fitting, and tighten it according to the instructions. Use it with a seat-belt installation as well as with lower anchors when permitted.
Confusing Installation Tightness With Harness Tightness
Even a firmly installed seat cannot protect a child properly with a loose harness. For rear-facing children, shoulder straps generally begin at or below the shoulders; for forward-facing children, at or above. Remove twists, buckle the harness, and tighten until you cannot pinch excess webbing vertically at the shoulder. Position the chest clip at armpit level.
Bulky winter coats can compress and leave dangerous slack. Buckle your child over thin clothing, then place a blanket or coat over the fastened harness for warmth. Our guide to checking a car seat harness fit can help caregivers make this a consistent routine.
Choosing a Position Without Checking Airbags or Fit
Children younger than 13 should ride in the back seat. Never install a rear-facing car seat in front of an active passenger airbag. The center rear seat can be a good choice when a proper installation is possible, but it is not automatically the best location if the seat cannot be secured there. Check nearby seat-belt buckles, head restraints, and the manufacturer’s rules about contact with a front seat.
A Two-Minute Check Before You Drive
When reviewing possible car seat setup mistakes, work in this order: verify the approved seating position and direction; trace the correct belt path; confirm the belt or lower-anchor installation is secured; check movement at the belt path; and verify the recline or top tether as applicable. Then buckle your child and check harness height, snugness, and chest-clip position.
Frequently Asked Questions
How much should a properly installed car seat move?
No more than one inch side to side or front to back when checked at the belt path. Do not judge the installation by movement at the top of a rear-facing seat.
Are lower anchors safer than a seat belt?
No. Both methods can be safe when used correctly and within the stated limits. Choose the installation method allowed by the manuals that gives you a secure fit.
Can I install a car seat in the middle of the back seat?
Often, yes, provided your vehicle and car seat allow that position and you can install the seat tightly. Do not assume the center has dedicated lower anchors.
Who can check my car seat installation?
A certified Child Passenger Safety Technician can review the installation and teach you how to repeat it. In the United States, the National Highway Traffic Safety Administration provides resources for finding inspection assistance.
Make the Final Check a Habit
The most useful car seat safety habit is not repeatedly tightening everything at random. It is checking the specific points where car seat installation errors occur: the approved belt path, locking method, anchor limits, movement, angle, tether, and harness. Keep both manuals accessible, and seek a technician’s help if any part remains uncertain before driving.